Django III에서 다루게 될 내용은 다음과 같습니다.
4-1 Django custom user profile
4-2 User-submitted content
4-3 Finishing touches
4-1 Django custom user profile
(1) Creating a user page
user.html 파일 생성
다음과 같이 파일을 생성합니다.
mysite > main > templates > main > (New File) user.html
user.html 파일 편집
다음과 같이 파일을 편집합니다.
mysite > main > templates > main > user.html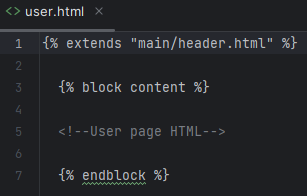
(2) Creating a profile model
models.py에 profile 모델 생성
다음 코드를 추가합니다.
mysite > main > models.py

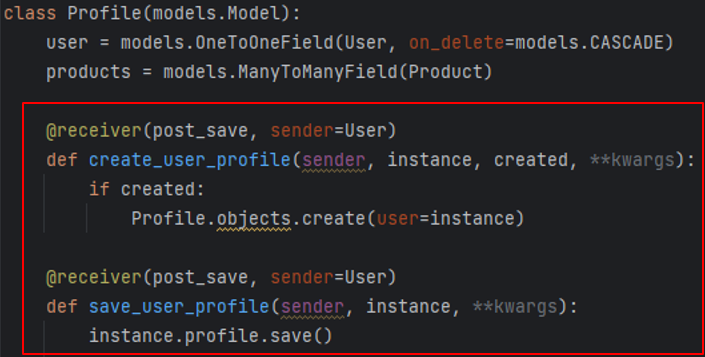
Django user 생성 및 저장 함수 오버라이트(overwrite)
다음 코드를 추가합니다.
mysite > main > models.py

Migrations 수행
다음 명령을 수행합니다.
>python manage.py makemigrations
>python manage.py migrate
기존 유저를 위한 프로필 생성
다음 명령을 수행합니다.
>python manage shell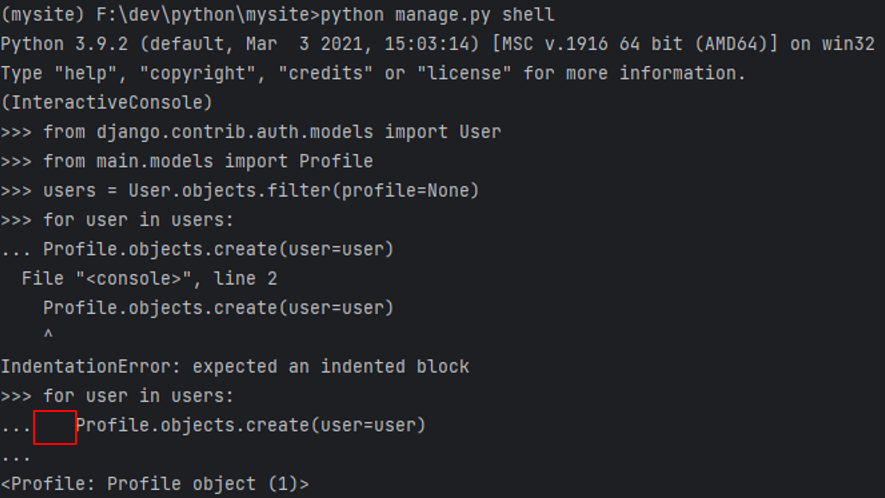
위와 같이 오류가 나면 (TAB)을 누르고 Profile.objects.create(user=user)을 입력하면 정상 동작합니다.
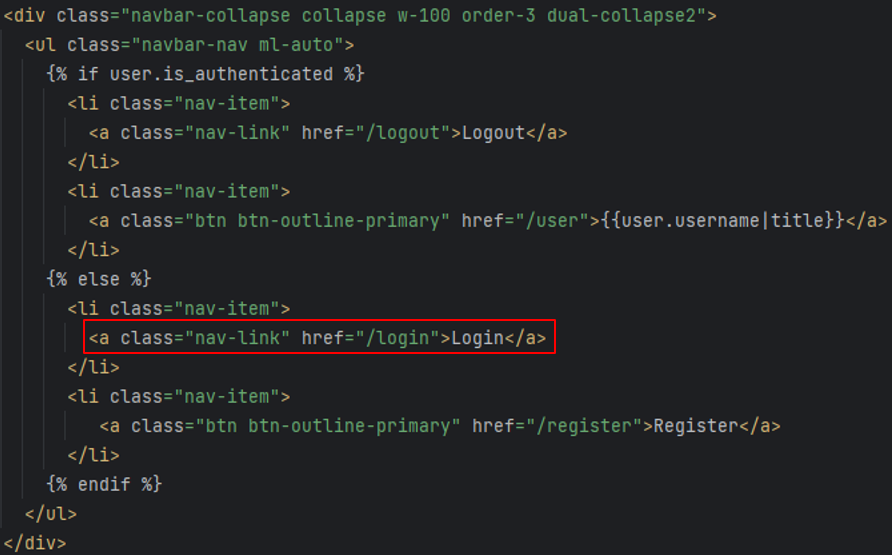
User 링크를 navbar.html에 추가
다음 코드를 추가합니다.
mysite > main > templates > main > includes > navbar.html
(3) Creating user and profile forms
forms.py에 user 폼 추가
다음 코드를 추가합니다.
mysite > main > forms.py
forms.py에 profile 폼 추가
다음 코드를 추가합니다.
mysite > main > forms.py

user.html을 usls.py에 추가
다음 코드를 추가합니다.
mysite > main > urls.py
Userpage 기능을 views.py에 추가
다음 코드를 추가합니다.
mysite > main > views.py

변수들을 user.html에 추가
다음 코드를 추가합니다.
mysite > main > templates > main > user.html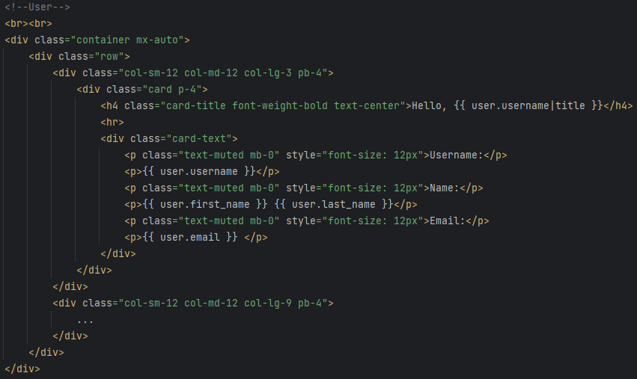
브라우저에서 확인해 봅니다.
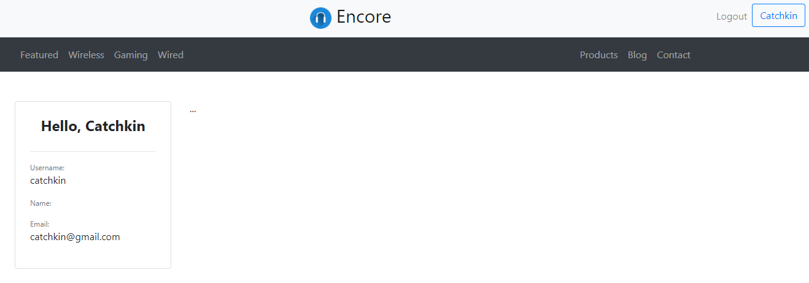
UserForm을 user.html로 연결
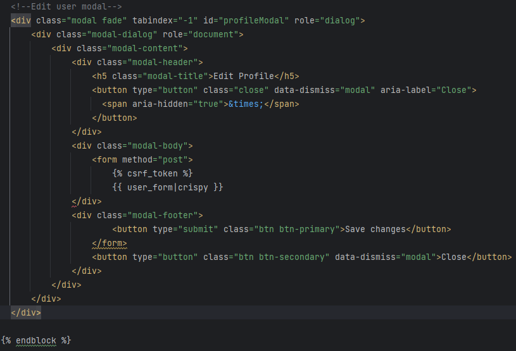
다음 코드를 추가합니다.
mysite > main > templates > main > user.html
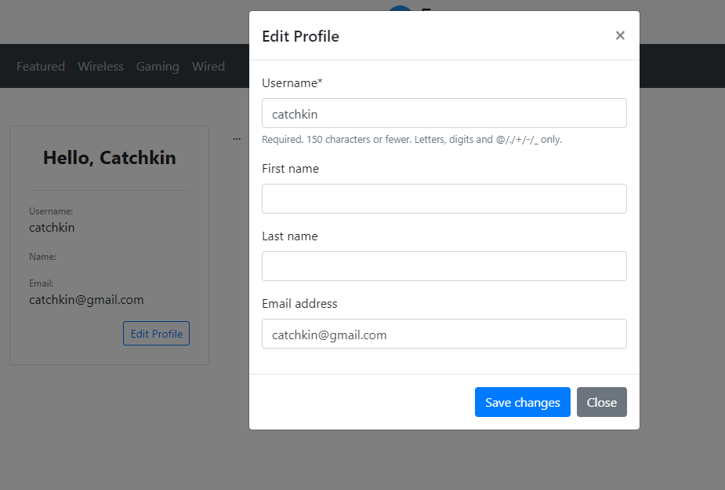
다음과 같이 Modal 팝업 창 코드를 추가합니다.
브라우저에서 확인해 봅니다.
ProfileForm을 user.html로 연결
다음 코드를 추가합니다.
mysite > main > templates > main > user.html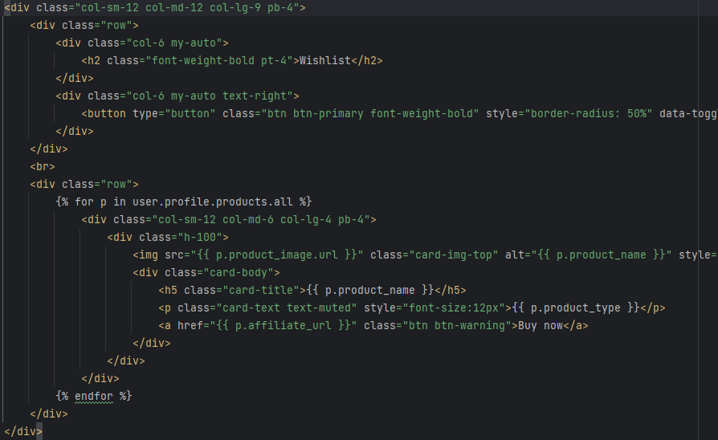
Wishlist modal 추가
다음 코드를 추가합니다.
mysite > main > templates > main > user.html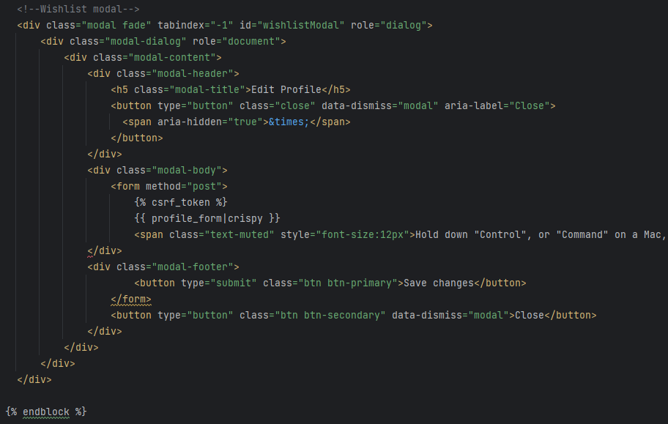
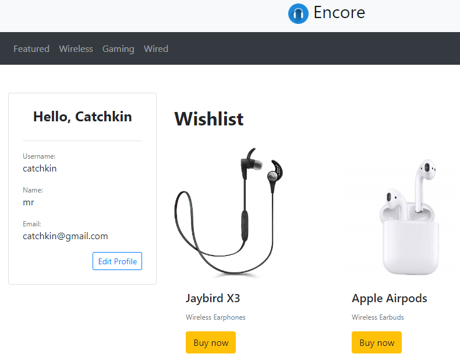
브라우저에서 확인해 봅니다.
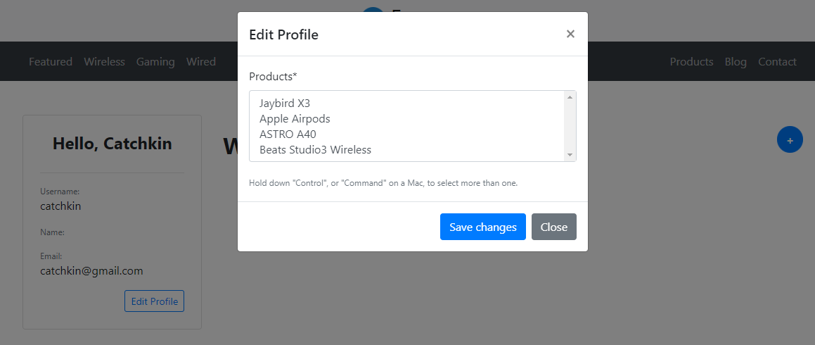
(4) Using Bootstrap modals
User와 profile 폼 변화를 저장하기 위한 views.py 수정
다음 코드를 추가합니다.
mysite > main > views.html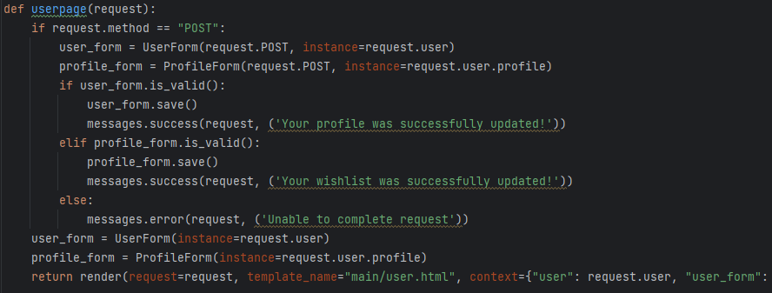
브라우저에서 확인해 봅니다.
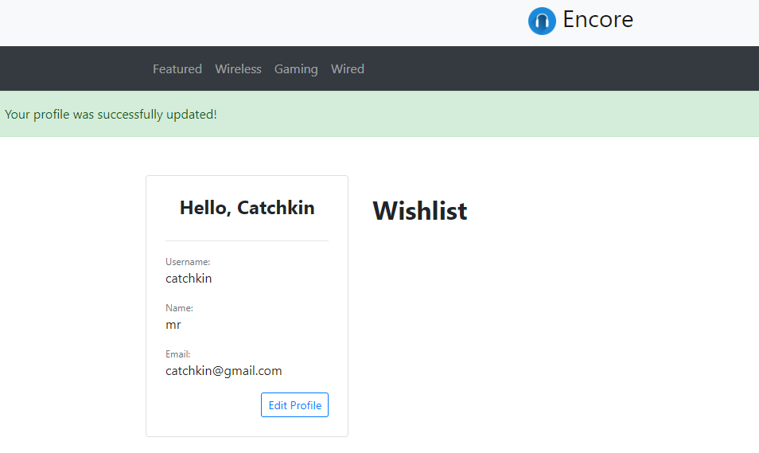
(5) Adding a wishlist button to the products
Wishlist 버튼을 products.html에 추가
다음 코드를 추가합니다.
mysite > main > templates > main > products.html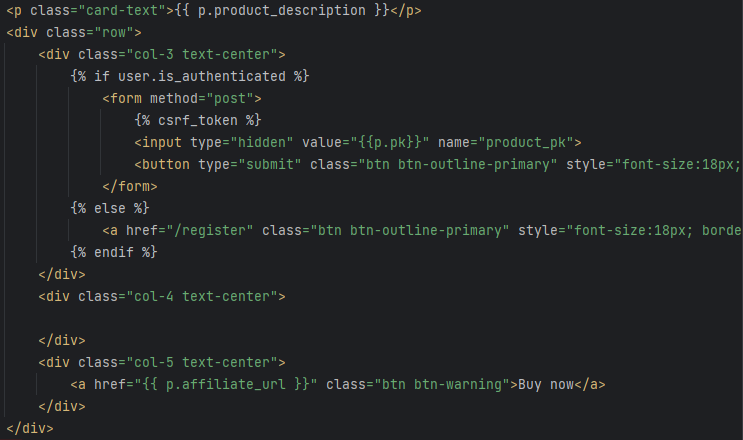
views.py에 있는 product 코드 업데이트
다음과 같이 코드를 추가합니다.
mysite > main > views.py
브라우저에서 확인해 봅니다.
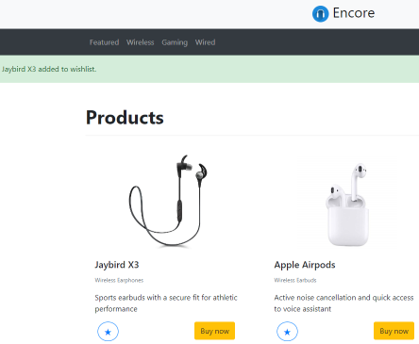
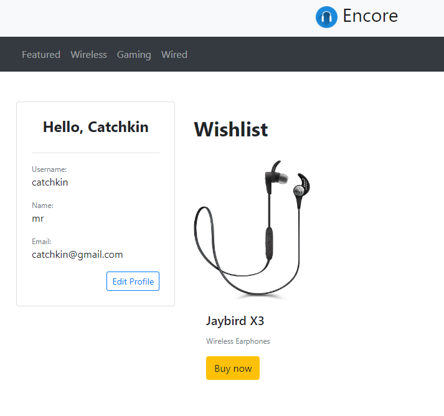
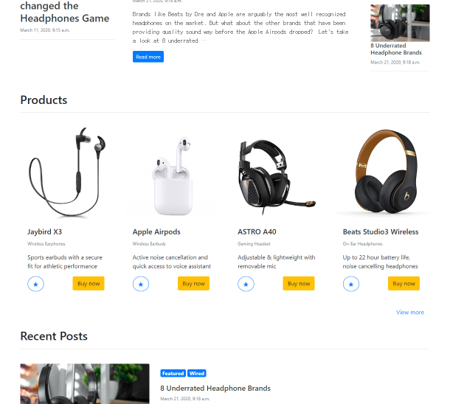
home.html에서 wishlist 버튼을 product에 추가
다음과 같이 코드를 추가합니다.
mysite > main > templates > main > home.html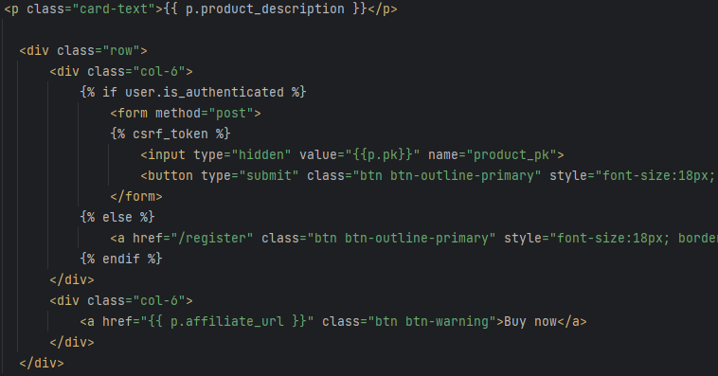
wishlist 기능 추가 코드를 위한 homepage view 업데이트
다음과 같이 코드를 추가합니다.
mysite > main > templates > main > home.html
브라우저에서 확인해 봅니다.
로그인 한 사용자에게 특정한 CTA 버튼 연결
다음과 같이 코드를 추가합니다.
mysite > main > templates > main > home.html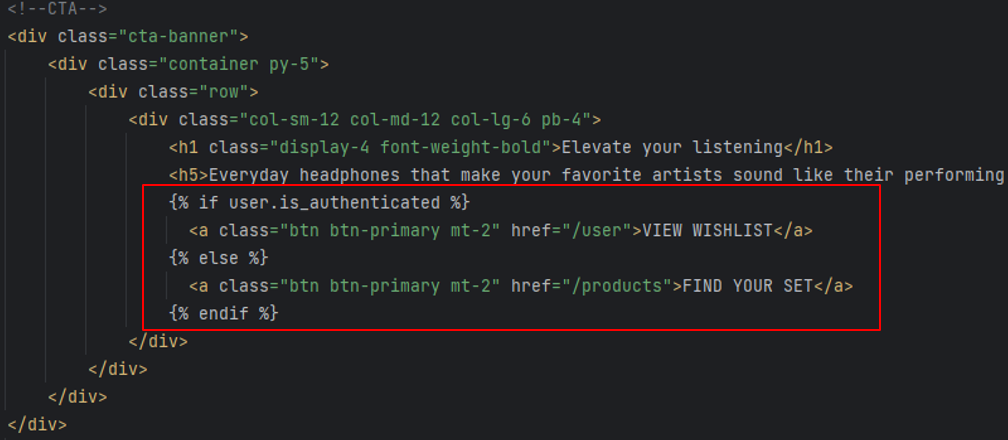
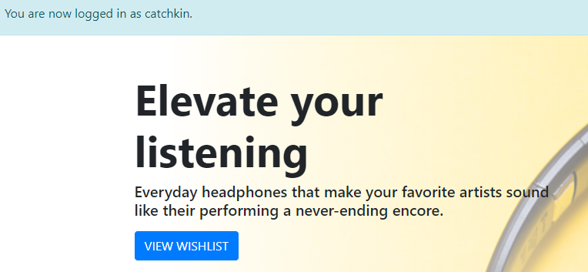
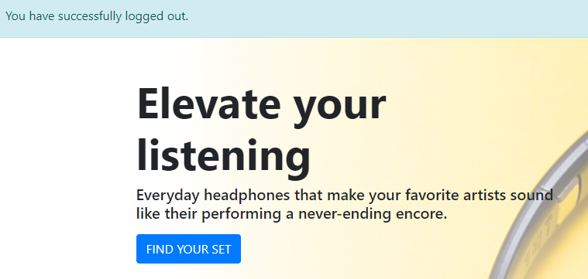
브라우저에서 확인해 봅니다.
